Thursday, November 13, 2014

A Monet Scarf Update


I've spoken about this scarf before in A Beautiful, Frustrating Scarf and guess what?... I still love the look of this scarf and I still can't find the right wrap for it.  But at least once a week I pull it out and wrap it in various ways in the hopes that this week I will happen upon the magic combination perfect for this wrap.  I really want the hints of pink to show since they help tie this scarf to the Monet paintings of Water Lilies that I associate the scarf with so I have to tie it just right to get them to show and that doesn't always work.  It's also a pretty darn huge scarf, 3X as wide as most of my Tichel scarves and if I just wrap it around my head once and tie it at the base of my neck, both tails still reach past my knees.  I'm considering cutting and hemming it into two smaller scarves but I haven't quite reached the point of no return yet.  So with all that in mind here are this weeks two best contenders for my Monet scarf wrap.


I'm using a royal blue scarf to try and make the monet scarf pop.  It's not terrible but the tails you see resting on my chest are also trailing almost to my knees and every attempt to put them up somehow makes the wrap too large and bulky.  Although I guess I could pretend I wanted it to look like I had a waterfall running off my shoulder.


I decided that this scarf might want to be a hijab since it was so huge and tried wrapping a couple of the "hijab" styles.  I tried the traditional up and over the head to full and tightly frame the face but you will not find that picture here because I looked like a drowning victim trying to get one last gasp of breath before sinking under the water of the pond.  Monet's Water Lilies and that particular style of hijab wrap are not compatable.  The wrap above, however, is probably the best one I've found with this scarf so far.  It's not in my normal style range but it's fun and does actually show the scarf off like I want.

Wednesday, November 12, 2014

Tuesday Tutorial - Killed by Canning


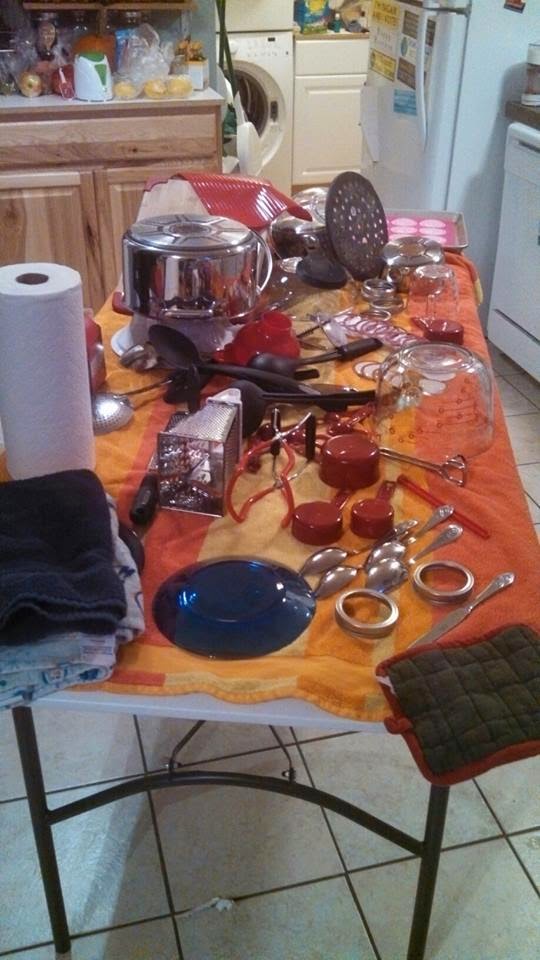
Today was the final day of my weekend long jam, jelly, spread and syrup canning spree.  Why was today the final day?  Because I ran out of jars and lids.  All told I put up 78 jars.  I know there are some experienced canners out there that will scoff at my 78 jars but for me it was a herculean effort especially since we have a toddler in the house so most of my canning projects couldn't start until after 8:30PM.  I made:

*blackberry/raspberry jam

*sugar free blackberry/raspberry jam (so I can share with my diabetic neighbor)

*Blue Sunshine Jam (a lemon/blueberry jam that I had to make because I accidentally thawed one of my bags of blueberries)

*apricot/blackberry spread (I can't wait to use this on some BBQ)

*Root Beer Syrup (it was supposed to be jelly but my Pectin was close to the use by date and didn't set but I'm actually pretty excited it came out as syrup because it is going to taste great on pancakes)

*Raspberry Chipolte Sauce (Honey's favorite). 

I'm hoping to get a tutorial up this week on how to change/convert your wide headbands if the elastic is too tight but it probably wont be up until Thursday at the earliest.

Sunday, November 9, 2014

Canning Zombie


And the jams go marching three by three. hurrah! hurrah!

I am too tired to type but I had to show someone my awesome little marching line of jam and my honey went to bed hours ago.  I made three different jams (well two were the same jam in sugar and no-sugar varieties) and tried out Pamona's Pectin for the first time (there is a definite learning curve but I'm getting better).  And tomorrow I get to do it all again....Oh Joy!   I'll try to do a better post tomorrow with links to recipes and stuff.  I have a dish-washing-minion, I mean helper-who-wants-to-learn-how-to-can tomorrow so things should go faster.

All washed and ready for tomorrow

P.S. I probably shouldn't post while sleep deprived....

Friday, November 7, 2014

Ahhh Small Towns ...

Pretty Pretty Purple Turban

I kinda wanted to write a rant about my "helpful" fellow shopper who followed me around the store today giving me the stink eye (I guess she was 'volunteer' store security making sure I wasn't casing the place) but Fuck It! I looked awesome and I've decided she was just jealous.

Thursday, November 6, 2014

Worst Scarf Tutorial Ever...Not Bad

So what do you do when you're cuddled at home with a cold?  Play around on the internet looking at covering blogs and tutorials...duh.  And what do you do when you find a tutorial titled "Worst Scarf Tutorial Ever"?  Try tying it of course!!!  And in the end the result wasn't bad at all.  It's kinda a cross between my ever favorite lazy turban and something a little more involved and tichel-y.  This is definitely getting added to my "lazy day wraps" repertoire.  With no further ado I present the results of the "Worst Scarf Tutorial Ever"....


I could have added a pin and made it look pretty fancy but turning around and selecting an appropriate pin seemed like too much work in my stuffy nose induced haze.  But if anyone else wants to watch the "Worst Scarf Tutorial Ever," here is it...


Wednesday, November 5, 2014

Tuesday Tutorial - Tichel Pin Display Frame


 Someday I hope to have an elaborate scarf storage area that meets all my needs in one handy place but until that magic day comes, I'm going to keep addressing my scarf and accessory storage needs one at a time as they become an issue.  For this tutorial, I've made a nice little cork backed tichel pin storage board.

You will need
 - an old picture frame (preferably a pretty one but if it's ugly you can always paint it)
 - some biggish pieces of scrap cardboard
 - a sheet of cork (I picked mine up as 12"X12" tiles in a 4 pack in the office supply section at Walmart)
 - Fabric (I used velvet because I had some left from the last project and it wont show the pin holes like some fabrics would)
 - Aleene's Original Tacky Glue (don't use Elmer's because it drys too hard for our purposes)


1 - Gather any old picture frames you have laying about.  (bonus points if you have picture frames with broken glass since we will be discarding the glass anyway)


 2 - Choose a picture frame that has tab closures holding the back in place like the picture frame on the right. (I preferred the picture frame on the left but since the picture slides into place rather than being held in by tabs it was not suitable for our purposes.  Learn from my mistake so you don't have to make a second trip to the Thrift Store)


3 - Disassemble your picture frame.  Discard the front glass or save it for use in another project.  There is usually something inside the picture frame that fits into the picture frame perfectly (sometimes it's a piece of cardboard, the back of the frame or the matting) that you will want to save.  Once you have determined which piece fits into the frame the best, that will become the template for your future cuts.


4 - Using your template (in my case the white mat seen above), cut a piece of the cork to the size of the frame and at least one sheet of cardboard.  Once these are cut, place them in the frame and make sure they fit snugly.  If they are loose, add an additional layer of cardboard.


5 - Because cork can be fragile and flimsy, you'll want to attach it to the sheet of cardboard with a thin layer of Aleene's Glue.  Use a sponge or your finger to "paint" the glue into a thin sheet rather than the thick cords laid down by the glue bottle.  Once you've glued the cork and cardboard together, weight them down with several heavy books and let them dry for 40 min to an hour.


6 - While you are waiting for the glue to dry on the cork, you can cut out your fabric.  Using your template from earlier, cut the fabric about 1 inch larger on all sides than the template.  Then trim the corners off like shown above.


7 - When the glue between the cork and cardboard is sufficiently dry, add another even thinner layer of Aleene's to the front of the cork paying special attention to the edges.  With your fabric "nice" side down on the table, carefully place your cork sheet glue side down onto the fabric.


8 - Use heavy books to weight and flatten your fabric/cord/cardboard sandwich while it is drying (30 min -1 hr)


9 - glue the edges of the cardboard backing and fold the edges of the fabric onto the glue 


10 - Carefully fit your fabric/cork/cardboard sandwich into the picture frame (be gentle because it should be a tight fit) and use the tabs to secure the frame closed.


11 - TADA!!!! Your Tichel Pin Display is done!!  Now all you have to do is hang it on your wall and start poking it with pins.


Monday, November 3, 2014

Topping my Grubby Clothes with a Crown


I hope I'm not the only one spending my work-around-the-house days in old yoga pants and an old T-shirt that may or may not have a couple holes in the bottom corner.  Most of the time when I'm spending a day working on laundry and clipping basil plants to make Pesto I just toss a plain turban or a wide headband over my head.  Occasionally, however, I get a little more creative and spend that extra minute on my wrap.  I'm still wearing yoga pants (or in this case yoga capris which might be even worse) and an old t-shirt but it doesn't matter because I am the Queen of all I survey (and I have the crown to prove it).          

Sunday, November 2, 2014

Taking a Deep Breath

This was a busy weekend both physically and spiritually.  I've felt pulled in so many directions for the last week that it's very satisfying to sit down, take a deep breath and look back at some of the moments of wonder that snuck their way into my hectic weekend.


On Samhain night we built a candle labyrinth in the back yard and at the center built a sacred fire in the firepit.  Walking a labyrinth is a very personal thing and I'm sure each person who had the chance to walk the labyrinth experienced it differently.  But for me it was a very lightening journey.  As I walked the path and sang chants to my ancestors, I felt the weight of my "oh so important/must be done right this minute" obligations fall away.  For ten minutes I sat in the cradle of eternity.  Warmth. Light. Comfort. Hope. The desire to not see me make the same mistakes as they did.  I felt all that and more for those ten minutes in eternity. It's faded now. More a candle than the bonfire I experienced that night but that's OK.  I can still close my eyes and feel the warmth and see the love and that's enough for now.


Probably because of the realignment of my priorities I experienced Friday night, I also had the chance to overcome a fear that had been plaguing me for some time.  I've been using "Blood of my Blood" by Rachael Hilton as part of our Fellowship's Samhain celebration for the last three years.  Each year I want to sing it to truly allow the power of the chant to come through and each year I read it as a poem instead.  This was one of the chants I sang as I walked the labyrinth and something just clicked. "yes...this is right...this is a chant not a poem and it is more important to honor the ancestors in song that it is to hide from my fears."  So this morning I sang (belted) this chant and allowed the true power of the words to come though as they never did when I read it as a poem.

Tuesday, October 28, 2014

Tuesday Tutorial on hold due to Nursing Duties


Honey is sick.  And Honey is not a good patient.  He tries to be but all his attempts to do for himself when he's all feverish and shaky just make more work for his caregivers.  I'm going to postpone this weeks Tuesday Tutorial until tomorrow or Thursday so I can go cuddle with my sick honey and try to warm him up.

Cooking at Midnight

Three Squash Soup.  An accidental stress reliever.


Lately I've felt overwhelmed by the many small but persistent annoyances in my life.  It's funny I have plenty of "big" annoyances/problems but I develop plans to tackle those issues and don't feel so overwhelmed by them because I know they are there and I have a plan to help me cope with them.  It's the little ones that get me.  Laundry needs to be folded (10 min). The dishes need to be done (20 min).  The Basil needs to be trimmed back and made into pesto (40 min). Pictures need to be saved to a back up disk (20 min).  The Little Monster needs a Dr's appt arranged (10 min).  I need to call me Mother In Law (10 - 300 min).  None of these annoyances would take too terribly long to solve (except maybe the mother in law one) but when they are all shouting at your senses at once it can be overwhelming.  I don't see a 10 min project but rather I see a collection of projects that will take days or even weeks to accomplish (and let's not even get started on things like the dishes that seem to magically reappear as soon as you've turned your back on a supposedly clean and empty sink).  Sometimes the hopelessness of catching up can freeze me in my tracks which actually just gets me further and further behind.

Today was such a day.  We have acquaintances coming over Friday.  Acquaintances, not 'friends.'  If friends were coming over, I wouldn't worry about the pile of old mail on the top of our computer desk that might fall and smother me as I type one day.  I wouldn't worry about the collection of plant pots sitting in the corner of the dining room waiting for me to have the time to transplant my Rosemary and Thai Basil.  I wouldn't worry about the sewing project "in process" on the table in the corner.  But these are acquaintances so I stress, and worry, and freeze.  They are nice people and probably wouldn't care.  But until I know for sure, I'll stress and clean and stress and organize and stress....And glare at my husband because in the end it's all his fault. (Silly husband wants a social life or some such nonsense.)

After spending more time spinning my wheels than accomplishing what I set out to do, I decided I needed a win.  Something I could look back on today and point to as one project I accomplished in its entirety.   For some reason I decided that project would be finally using up the stack of winter squash that have been sitting on my counter for the last month.  So armed with several small pumpkins, two delicata squash, and one butternut squash I started searching for a recipe.  Surprisingly, I found one.  The recipe here can be used for any winter squash and uses additional ingredients that are common staples in most kitchens.  (the only major change was using Curry powder instead of coriander, cumin, and cayenne.  Although my current batch veggie stock has a decidedly cumin and coriander flavoring so they were still in the soup.)   My determination to finish a project is how I found myself roasting squash at 11pm, sauteing onions and apples at midnight, blending it all together at 1am and currently writing a blog post while I wait for the soup to cool down enough to put in the fridge.   Yes, I'm up at 1:50am but I'm also happy I accomplished something even if it was a silly little goal that only freed up two feet of counter space.

P.S. The soup is delicious.


Saturday, October 25, 2014

A Terrible Picture...That Makes Me Happy


This is a terrible picture of me.  I am desperately trying not to snort in laughter at something my friend is saying and holding back a snort does not lead to good self portraits.  At the same time, this is an awesome picture.  I have this amazing friend who is a joy to spend time with whether it's watching a movie at the house, or going out for a "girls day."  And as if that was not enough, she also covers her head much of the time.  It's so awesome to have someone to trade scarves with or play with each others wraps like teenage girls braiding each others hair at a slumber party.  We snapped this picture as we were heading out to the fabric store to get some material for a new sinar tichel.  Yeah I'm very very lucky and that is why this is a good picture even if I am about to snort.


Friday, October 24, 2014

Wicked Girls Saving Ourselves


So it's after midnight and I should be snatching a few hours sleep before my wonderful little monster decides it's morning at a far earlier hour than is reasonable.  And yet I'm sitting at my computer listening to SJ Tucker and Seanan McGuire's music on YouTube.  I love both these artists and I love them even better when they come together and make something wonderful and powerful like this recording of "Wicked Girls" with Seanan's song being performed by "Vixy" Dockrey and SJ Tucker.


Wicked Girls

Wendy played fair, and she played by the rules that they gave her;
They say she grew up and grew old -- Peter Pan couldn't save her.
They say she went home, and she never looked back,
Got her feet on the ground, got her life on its track.
She's the patron saint priestess of all the lost girls who got found.
And she once had her head in the clouds, but she died on the ground.

Dorothy just wanted something that she could believe in,
A gray dustbowl girl in a life she was better off leavin'.
She made her escape, went from gray into green,
And she could have got clear, and she could have got clean,
But she chose to be good and go back to the gray Kansas sky
Where color's a fable and freedom's a fairy tale lie.

        Dorothy, Alice and Wendy and Jane,
        Susan and Lucy, we're calling your names,
        All the Lost Girls who came out of the rain
        And chose to go back on the shelf.
        Tinker Bell says, and I find I agree
        You have to break rules if you want to break free.
        So do as you like -- we're determined to be
        Wicked girls saving ourselves.

Alice got lost, and I guess that we really can't blame her;
They say she got tangled and tied in the lies that became her.
They say she went mad, and she never complained,
For there's peace of a kind in a life unconstrained.
She gives Cheshire kisses, she's easy with white rabbit smiles,
And she'll never be free, but she's won herself safe for a while.

Susan and Lucy were queens, and they ruled well and proudly.
They honored their land and their lord, rang the bells long and loudly.
They never once asked to return to their lives
To be children and chattel and mothers and wives,
But the land cast them out in a lesson that only one learned;
And one queen said 'I am not a toy', and she never returned.

        Dorothy, Alice and Wendy and Jane,
        Susan and Lucy, we're calling your names,
        All the Lost Girls who came out of the rain
        And chose to go back on the shelf.
        Tinker Bell says, and I find I agree
        You have to break rules if you want to break free.
        So do as you like -- we're determined to be
        Wicked girls saving ourselves.

                Mandy's a pirate, and Mia weaves silk shrouds for faeries,
                And Deborah will pour you red wine pressed from sweet poisoned berries.
                Kate poses riddles and Mary plays tricks,
                While Kaia builds towers from brambles and sticks,
                And the rules that we live by are simple and clear:
                Be wicked and lovely and don't live in fear --

        Dorothy, Alice and Wendy and Jane,
        Susan and Lucy, we're calling your names,
        All the Lost Girls who came out of the rain
        And chose to go back on the shelf.
        Tinker Bell says, and I find I agree
        You have to break rules if you want to break free.
        So do as you like -- we're determined to be
        Wicked girls saving ourselves.

For we will be wicked and we will be fair
And they'll call us such names, and we really won't care,
So go, tell your Wendys, your Susans, your Janes,
There's a place they can go if they're tired of chains,
And our roads may be golden, or broken, or lost,
But we'll walk on them willingly, knowing the cost --
We won't take our place on the shelves.
It's better to fly and it's better to die
Say the wicked girls saving ourselves.


Tuesday, October 21, 2014

Tuesday Tutorial - Velvet No Slip Headband

This week's tutorial is my first attempt to make one of those awesome velvet bands everyone swears by for keeping their tichels in place.  This velvet band is very grip-y and will help hold your heavier tichel wraps in place and give you some extra traction to keep those beautiful but slick scarves from sliding right off.

You Will Need -
*Stretchy Velvet in a color to match your hair, black, or cream (don't buy your velvet until you've read the entirety of the directions as the way the nap of the velvet falls is very important)
*Some thread to match the velvet
*Sew on Velcro to match the velvet
*Something to make a pattern with (pattern weight interfacing or even newspaper)


1 - First you need to measure around your hairline or where you normally wear your headcovering.  Because you will be using stretchy velvet you will actually subtract one inch from this measurement for the length of your headband (I didn't do this and my headband was too long and I had to cut some off the ends but if you are worried you can always make it too long and cut some off after you try it on in step 6).  Once you have your length, draw a straight line of that length on your pattern paper (make sure to leave a few inches above and below that line).  Mark the middle of your line.  At the middle, draw a line perpendicular to your first line that extends above and below that line two inches.  Draw a line at either end of the original straight line.  It should extend 1.5 inches on either side.  Connect your upright lines.  Your finished product should look very similar to the drawn out pattern above with the only major difference being the length of the original straight line in the center.

This is the old dress that is going to be cut up to become my new tichel grip band (and a couple other projects)
2- Feel your fabric to determine how the nap of the velvet lays.  You need the velvet to lay along the width of your band (the 4 inch wide part of your pattern), not the length (the part of your pattern that is the circumference of your head).  This concept is probably better shown than explained so you might want to refer to the Wrapunzel Video Tutorial on Velvet Bands to see what I mean.  


3 - Once you've determined the lay of your velvet, place your pattern on the velvet so the grain is along the width.  Pin the pattern and cut it out.


4 - Fold the headband in half and pin the unfinished edges together. 


5 - Using an overlock stitch (or a tightly packed zigzag stitch if your machine does not have an overlock stitch), sew the edges of your folded headband together.


6 - Try your headband on and make sure it fits and doesn't overlap at the back more than two or three inches.  If your headband overlaps too much, you can cut a little off each end and re-overlock those edges. (I made my band too long the first time and had to do this)


 7 - Place a pin at the very middle of your band.  Place two more pins evenly spaced on either side of your band (see the diagram above).  Using a straight stitch, sew a zigzag pattern from one pin to the next (your finished product should look something like the red line on the diagram above).  This will help keep your headband from stretching too far or rolling while you're wearing it.


8 - Pin on your sew-on velcro.  I usually pin the "hook" side on first so I can make sure it will be facing away from my scalp.  Then I pin the "soft" side to the part of the velvet band that faces the "hooks."  You'll want to test your pinning to make sure your velcro is in the right place.  You can wrap the headband around your own head or any other cylindrical object to test the velcro placement before you sew.  Once you've tested the velcro placement, carefully sew the velcro onto the headband with a straight stitch around the edges of the velcro.


9 - Your velvet tichel headband is finished!!! wrap it around the nearest person, object or foam head to celebrate!!!  Then you should try it on and start playing around with your heaviest and/or slickest scarves because now you can.  (Remember the velvet should be facing in such a manner that when you rub your fingers back from your hairline is almost feels like they are being grabbed by the velvet)

It's actually quite comfy

This ZigZag Wrap is one of the heaviest wraps I use.  The Velvet Headband held it in place with no problem.


Sunday, October 19, 2014

Boo at the Zoo


Just an update on the muslin sinar tichel I made to top my Scottish costume with a somewhat period accurate looking headcovering...It was great.  We were running late and I was able to wrap my hair in 30 seconds.  It looked right at home with the rest of my outfit and since it was made out of cotton, I didn't feel overheated when the weather got confused and made like it was midsummer in October.  In conclusion - I need to make a couple more of these and try to tye-dye them for every day wear since the muslin is comfortable but a little plain for anything other than a historical costume or around the house.


In only slightly related news, while at the zoo, our Little Monster's favorite animal was the piranha.  In an area with several interactive and attention grabbing animal exhibits and a jungle themed playground she kept running back to the small piranha display tank in the corner.  This confused the husband creature to some extent but made perfect sense to me.  They are shiny, carnivorous, and potentially deadly in a pack.  Sounds pretty awesome to me too.


A Historically Passable Headcovering

Simple yet surprisingly pretty muslin sinar tichel to go with my costume

My family has matching Scottish (for fun, not historically accurate) costumes.  They are fun to wear and we make quite an impression when we all match.  One problem...I made these costumes before I decided to cover full time.  One solution...Since I did the tutorial on Sinar Tichels earlier this week, I decided to make a quick one in plain muslin.  It allowed me to see what a sinar tichel would look like made out of the simplest fabric available and it got me a quick head covering for my costume.  I'm actually pretty pleased with the results and it is so comfortable I haven't taken it off since trying it one a couple hours ago.


I think it looks a little like the 14th Century headdress in this picture without the detail work.  I purposefully avoided adding adornment to the covering for two reasons. One (and the most important) - It would be stupid to add too much detail to muslin when the fabric is so cheap and thin.  Two - I have garb for several different eras (Ren Faire style Scottish, accurate 14th Century, Norse, ect) so the fewer time and culture bound details I put in the more chances I will have to use this covering.


Tomorrow I might try to twist the bands to make a crown like this.

Saturday, October 18, 2014

A Beautiful, Frustrating Scarf


I have this beautiful scarf.  I think it looks like Monet's Water Lilies and I can't wait to wear it.  If only I could figure out how to wrap it.  I've tried wrapping it in so very many different combinations and none of them show off the scarf to it's best.  I know I will find the perfect combinations of wrap and supporting scarves one day to let the beauty of this scarf shine.  I want a wrap that says "ode to famous artist on my head" not "oh look I found a pretty floral accent scarf."  Oh well...I'll keep trying.


Thursday, October 16, 2014

A Very Unsettled Sort of Day...

Today (or yesterday since I've stayed up so late I am now working on a new day) was a very interesting day.  I will admit to watching too much alarmist news and allowing the news of our current crisis/health scare to affect my mood far too much (I'm not going to specify which crisis/health scare.  You can just imagine it's whatever one is one the hot seat while you're reading this blog.)  Add to that a teething toddler and prep work for our Wed night Pagan Study Group and you have a very busy and emotionally draining day.

When I'm going though an emotional roller coaster, my wraps tend to make the journey right there with me.  Today I grabbed a simple dark blue scarf with some trim on the ends and a choker necklace that I like to tie on my wraps to add some metallic detail.  I started out with the scarf tied as a head band covering the top of my head but leaving the back of my hair out.  An hour later I was feeling unsettled and re-wrapped my head into a more traditional tichel style with all my hair pulled into a bun in the back and covered.  In the afternoon, I wanted to meditate (my little monster was napping) and switched to a quick turban style that helps me focus (this is the only wrap style that did not include the necklace).  Then it was back to my playful headband style for a few hours.  And finally I finished out the day with an elegant side knot that made me feel pretty as I puttered around the house.

Wow! I feel tired just thinking about wearing all those wraps in one day.  I can't imagine how the poor scarf feels.

The only incarnation of today's wraps I remembered to get a picture of.